Notice
Recent Posts
Recent Comments
Link
| 일 | 월 | 화 | 수 | 목 | 금 | 토 |
|---|---|---|---|---|---|---|
| 1 | 2 | 3 | ||||
| 4 | 5 | 6 | 7 | 8 | 9 | 10 |
| 11 | 12 | 13 | 14 | 15 | 16 | 17 |
| 18 | 19 | 20 | 21 | 22 | 23 | 24 |
| 25 | 26 | 27 | 28 | 29 | 30 | 31 |
Tags
- javascript
- 이중map
- 다중map
- teamproject
- React
- 팀프로젝트
- 구조화된 데이터
- react bits
- next.js
- miniproject
- react-hook-form
- Tanstack Query
- 문제
- echarts
- wescanner
- mini
- html
- project
- ios26
- xcode26
- KBW
- Threppa
- useForm
- api 35
- React-native
- css
- ToyProject
- JS
- 일본 우편번호 api
Archives
- Today
- Total
블로그 이름을 입력해주세요
[React & Next.js] react-hook-form 효율적으로 사용해보기 - 2 본문
react-hook-form 활용해보기 2
전 글에 이어 이번에는 react-hook-form의 useForm을 사용하여 email과 password에 값을 넣을 수 있는 방법을 보도록 하겠습니다
useState를 통해 사용하였던 로그인을 그대로 이용하겠습니다

export default function UseForm() {
  return (
    <Container>
      <Title>Login</Title>
      <FormInput>
        <InputBox>
          <h4>아이디</h4>
          <input type="text" name="email" />
        </InputBox>

        <InputBox>
          <h4>비밀번호</h4>
          <input type="text" name="password" />
        </InputBox>

        <input type="submit" value="초기화 전송" />
      </FormInput>
    </Container>
  );
}
react-hook-form에 주요 기능인 useForm을 사용하겠습니다
useForm의 주요기능을 하나씩 봅니다
useForm의 세팅
import { useForm } from "react-hook-form";

export default function useForm() {

  const {} = useForm();

  return(
    ...생략
  )
}
useForm의 사용할 준비를 마쳤습니다 이제 useForm 값을 받아오기 위해 저는 register를 사용하겠습니다
register
import { useForm } from "react-hook-form";

export default function useForm() {
  const { register } = useForm();

  return <input type="text" {...register("email")} />;
}
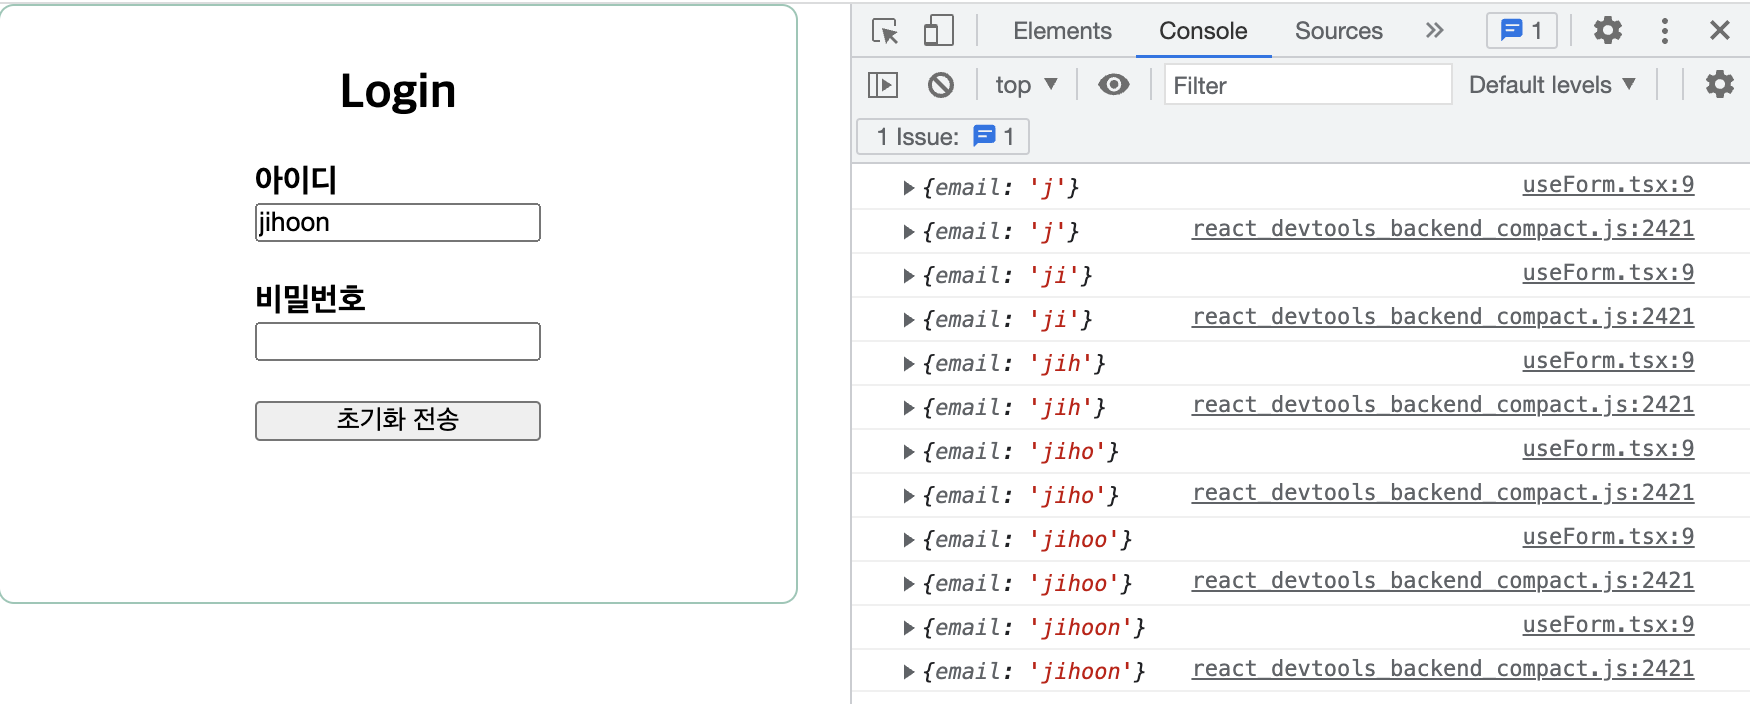
값이 객체로 잘 담겨져 있나 확인하고 싶으면 watch()를 이용하면 실시간으로 반영되는 값을 확인 할 수 있습니다 콘솔로그로 확인 해봅시다
watch
import { useForm } from "react-hook-form";

export default function useForm() {
  const { register, watch } = useForm();

  console.log(watch());

  return <input type="text" {...register("email")} />;
}
register에서 유효성 검사를 진행 할 수도 있습니다
// 빈값
<input
  {...register("email", {
    required: true,
  })}
/>

// 최대 글자 수 및 최소 글자 수
<input
  {...register("test", {
      maxLength: 2 // or
      minLength: 1
  })}
/>

// 정규식 유효성 패턴 검사
<input
  {...register("test", {
    pattern: /[A-Za-z]{3}/
  })}
/>
상당히 많은 register의 유효성 검사 기능을 이용할 수 있습니다 더 많은 것을 알고 싶다면 공식문서를 참고 하세요
공식문서
(https://react-hook-form.com/api/useform/register/)
참고로 register의 기능 중 에서 onChagne를 통해 값을 받아올 수 있습니다
하지만 저는 useForm의 handleSubmit을 사용하여 지금부터 input의 값을 전송하는 방법을 알아보도록 하겠습니다
handleSubmit
import { useForm, SubmitHandler, FieldValues } from "react-hook-form";

export default function useForm() {
  const { register, watch, handleSubmit } = useForm();

  const onSubmit: SubmitHandler<FieldValues> = (data) => {
    console.log(data);
  };

  return (
    <form onSubmit={handleSubmit(onSubmit)}>
      <input type="text" {...register("email")} />
      <input type="submit" value="초기화 전송" />
    </form>;
  )


}
email창에 값을 담아 초기화 전송을 눌러 onSubmit의 콘솔로그를 확인해 보세요 이를 통해 data안에 email값이 객체로 잘 담겨져 있습니다

다음 글에서는 useForm의 error를 핸들링 하는 방법에 대해 알아보겠습니다
감사합니다
